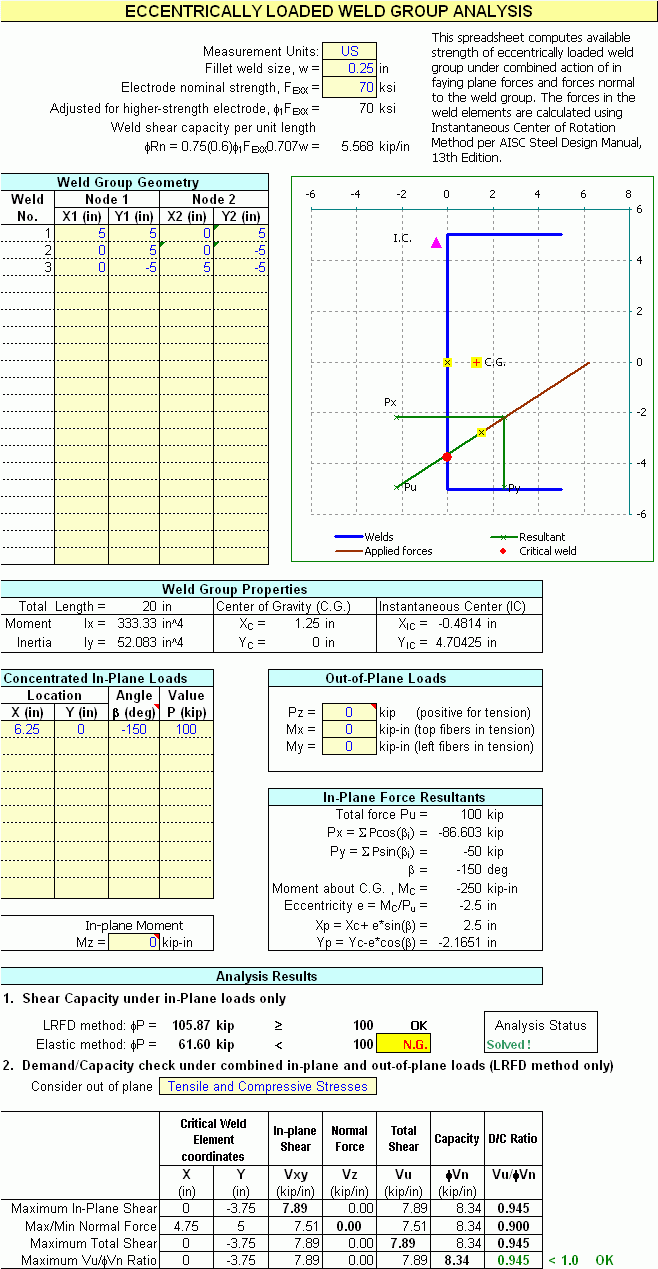
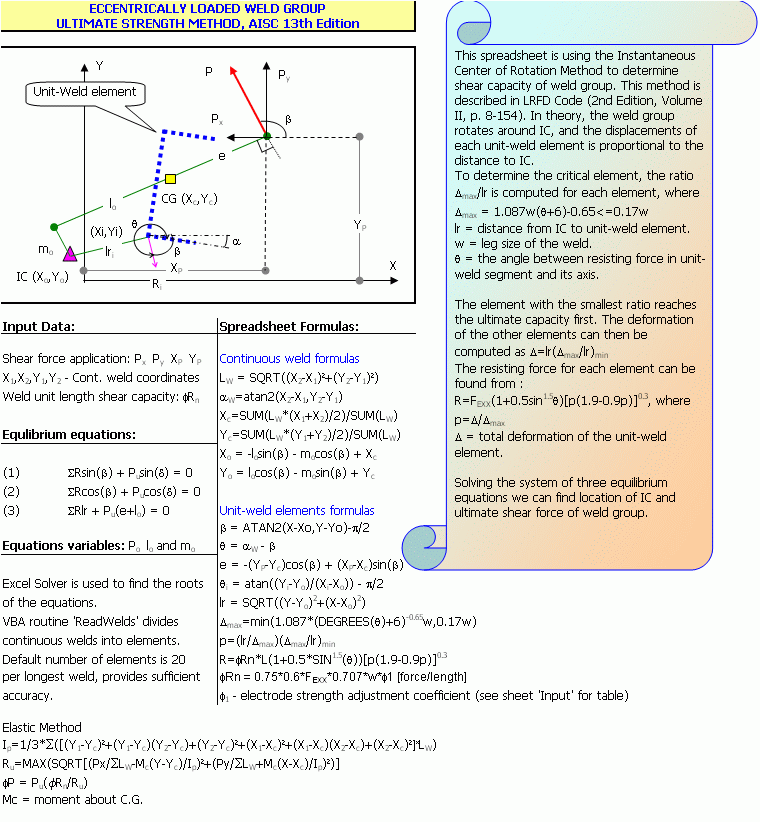
The WeldGroup spreadsheet calculates the resistance of weld groups subjected to eccentric forces, using both plastic and elastic methods of analysis in accordance with the AISC Manual. Plastic analysis applies only to fillet welds loaded in the plane of a faying surface and takes advantage of the higher strength of welds loaded at an angle. For transversely loaded welds, it accounts for a 50 percent increase in strength compared to longitudinal loading. In the case of eccentrically loaded weld groups, plastic analysis employs the Instantaneous Center of Rotation Method, which is more economical and better aligned with test results than the elastic method. Plastic analysis may also be used for groups of parallel linear welds loaded out of the faying surface plane, a condition defined as a Special Case in Table 8-4 of the AISC Manual. In this situation, shear capacity is determined as the resistance of a single in-plane weld multiplied by the number of welds in the group. The spreadsheet follows this approach, though its plastic analysis does not consider out-of-plane forces.
Elastic analysis, by contrast, is used for weld groups loaded either in the plane or normal to the faying surface. It calculates stress vectors in three directions using the conventional elastic approach and then combines them geometrically. This method is applicable to both fillet and PJP welds.
The spreadsheet provides a clear design summary, detailed results, and supporting theory and formulas, making it a practical tool for both design and verification.
The WeldGroup spreadsheet supports irregular weld patterns and provides both LRFD and elastic analysis methods in accordance with the AISC Manual, 16th Edition. It accommodates multiple force components acting both in-plane and normal to the faying surface, and can automatically generate common weld patterns for convenience. The program is fully compatible with both SI and US customary units.

 <
<
In modern Excel, macro security is managed through the Trust Center. To enable macros:
Step 1: Go to the File tab -> Options.
Step 2: Select Trust Center, then click Trust Center Settings.
Step 3: Choose Macro Settings.
Step 4: Select Disable all macros with notification (recommended). This allows you to enable macros when opening Boltgroup without lowering security globally.
Step 5: Click OK to save.
Activate the Solver add-in to make the Solver command available under the Data tab:
Step 1: Go to the File tab -> Options.
Step 2: Select Add-ins.
Step 3: In the Manage dropdown at the bottom, choose Excel Add-ins and click Go.
Step 4: Check the box next to Solver Add-in and click OK.
Step 5: Confirm the Solver command appears under the Data tab in the Analysis group.
If you receive an Excel warning after clicking Calculate from the Boltgroup menu, the Solver VBA automation library may not be referenced correctly. Follow these steps:
Step 1: Open the VBA editor by pressing ALT + F11.
Step 2: In the Project Explorer (usually on the left), review the list of open workbooks and add-ins. If SOLVER.XLAM is listed, the issue lies elsewhere. If it is not listed, the Solver reference is invalid.
Step 3: In the Project Explorer, select your Boltgroup workbook. Enter the VBA project password provided with your licensed copy of Boltgroup, then click OK.
Step 4: From the VBA menu, go to Tools -> References. Locate the reference named Solver. If it is unchecked, check the box. If it is marked as MISSING, uncheck it, scroll through the list, and select the correct Solver reference (it may appear as Microsoft Solver).
Step 5: Click OK to confirm, then save the workbook.